|
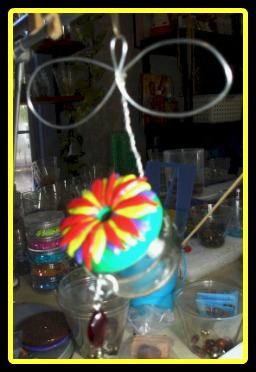
Polymer ClayPolymer clay does not contain clay at all. The feel and the workableness is just like clay. This clay comes in a variety of colors and also many brands, but all brands are not created equal. To find out which brands I liked best, I bought one block of clay from each of the manufactures, then I decided which one I liked the best. That is what I suggest you do. Hummingbird FeederThe project that I would like to share with you is a hummingbird feeder. I saw this is an issue of "Birds and Blooms" and I thought it was the cutest thing ever, so I knew I had to make it.
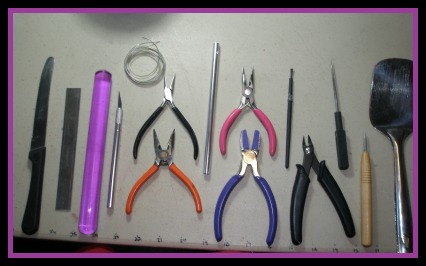
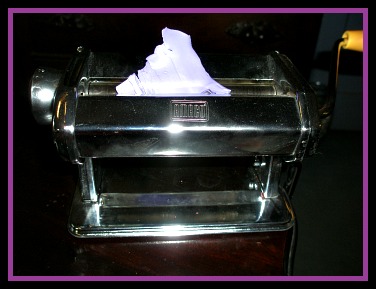
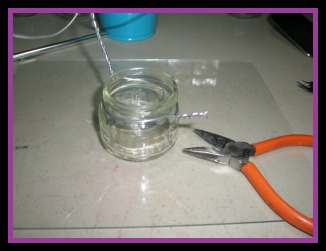
What you Need: * small baby food jar* exacto knife* rolling pin (I use a pasta machine)* wire (16 gauge)I found this wire to be hard to work with, so I've been experimenting with different gauges.* knife or blade* wire cutters* polymer clay (3 colors)**Remember hummers are attracted to red)* oven* gloss paint
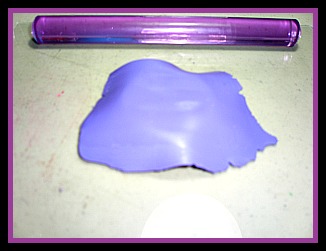
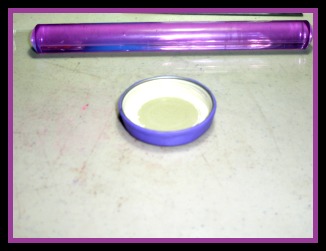
What to do: 1.Clean and dry your baby food jar. 2.Choose the color of clay that you want to use to cover the jar lid.
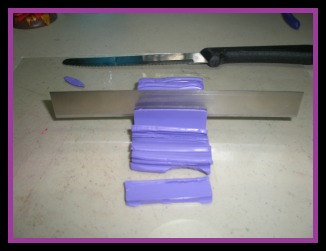
3.Cut 5-6 slices of clay from the bar.
4.Lay flat, overlapping slightly, pressing firmly.
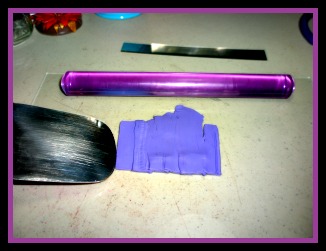
5.Roll clay with rolling pin or run through pasta machine until clay is smooth and the size that you need to cover the lid. (This is called conditioning the clay)
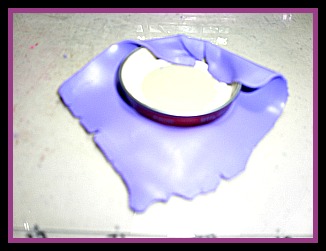
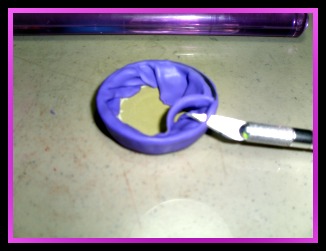
6.Cover lid and smooth into place. (If you have any air bubbles, pop them with the tip of your exacto knife, then smooth holes with your finger.
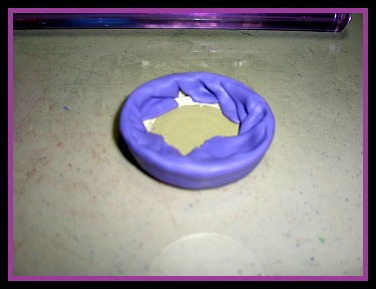
7.Remove excess clay by cutting around edge with exacto knife.
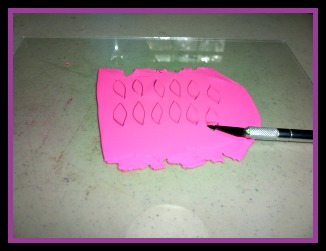
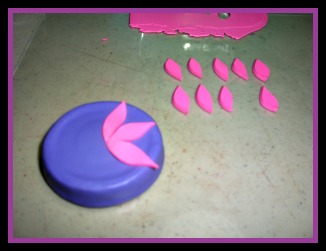
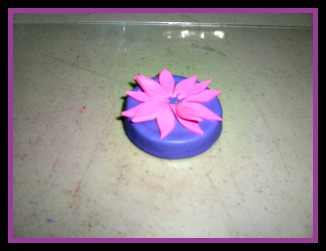
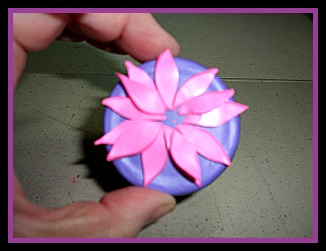
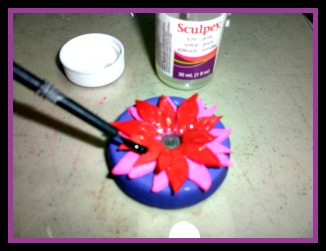
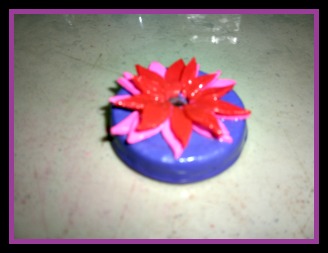
8.Repeat steps 3-5 with your second color. 9.Lay your polymer clay on a flat surface and cut flower shapes.
10.Arrange on top of lid.
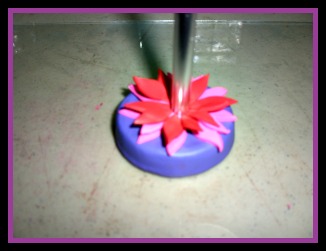
11.Repeat steps 3-5 with your third color (This is where I use red or orange) 12.Remove clay from the middle of your flower. (I use a pipe from an old windchime)
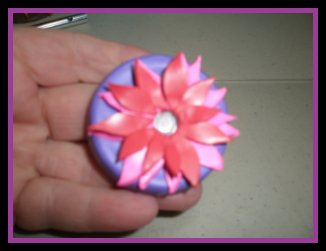
13.Bake your flower at 275-300 degrees for 15 minutes. 14.When cool, paint with a gloss or satin paint.
15.Drill a hole through your lid and press the sharp points down on the underside.
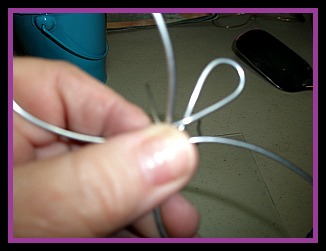
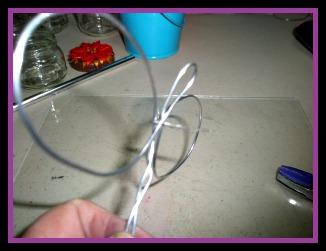
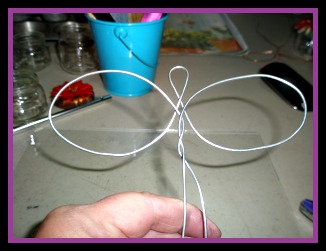
16.Cut a piece of wire about 32" 17.Fold in half, forming a loop. Overlap wires and bend forming loops for a bow.
18.Twist 8 times. (I use a small pair of jewelry pliers for this)
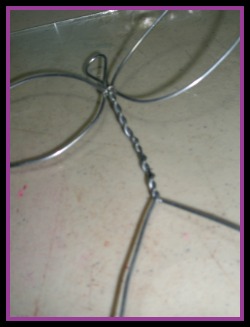
**At this point I use a small gauge wire to hold all my loops together)
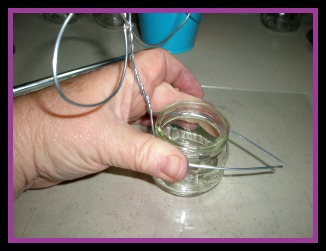
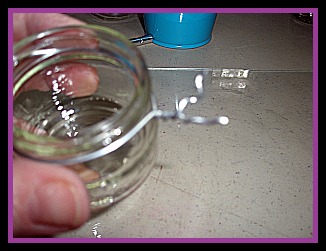
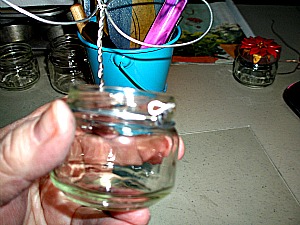
19. Wrap wire around baby food jar. Twisting a few times until it is tight.
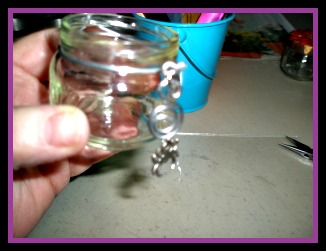
20.You can stop here, fill with sugar water, hang and enjoy OR 21.Using a pair of needle nose pliers form a loop. 22.Hang a piece of decorative wire and a charm or a pretty bead.
23.Now, fill with sugar water, hang, and let the hummingbirds enjoy. I hope you like using polymer clay, as much as I do. I would love to see the ones that you make. Please share your experience with me. They look really great when hung in a group.
Do You Have A Great Picture/ Story About This Topic?Do you have a great piece of Whimsical Art to share with us? We would love to see what you've made, found, or even bought. Anything, if you love it, it's special. What Other Visitors Have SaidClick below to see contributions from other visitors to this page...
Hummingbird Feeder Not rated yet To: Home Page.. From: Polymer Clay
|